


Kim Porter from The River Church in Liberty Township, OH brings us this stage design for a series called Wired.
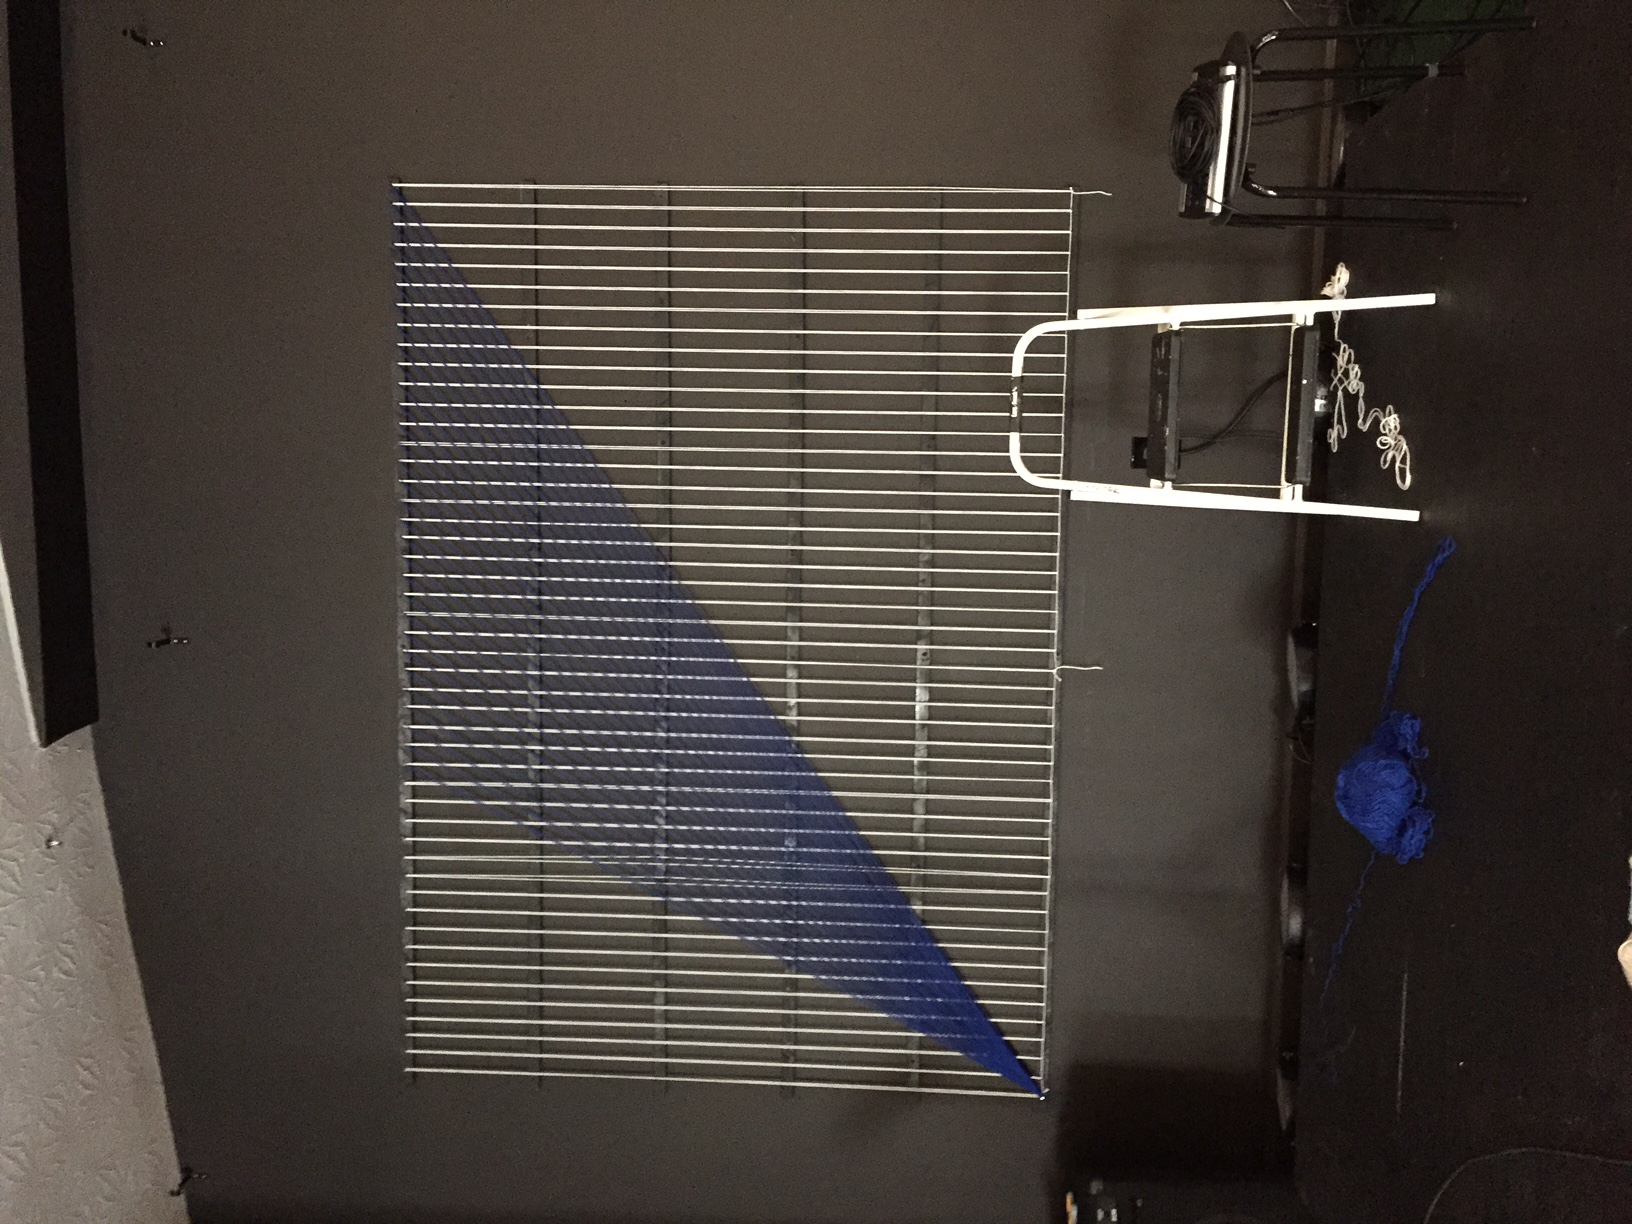
Kim’s stage design budget is typically around $200 every series, so she’s always challenged to find ideas that are not only economical, but also work on a smaller stage. Their series was called WIRED, so she found some concepts on this website that she could recreate and make her own. She took the idea of using frames and yarn and instead decided to mount the yarn directly to their back wall. They had put up 1×2 strips last year and painted them black so they could use them to hang things if necessary. Kim used small black nails spaced two inches apart at the top and bottom of her work space. Then she used the yarn to create patterns. Up lighting helped finish off the look.
For the WIRED sign, they found a piece of 4 x 8 particle board on clearance and had them cut off 1 foot to make it 3 x 8. They saved the piece that was cut off. Then after drawing and mapping out the letters, they drilled holes in the board. They painted the board with primer. Then after 24 hours, used 2 inch painters tape to create the letters. Then they rolled the entire board with the blue paint. After it was almost dry, they removed the tape. The lines were not clean but it was easy to go back and neaten up the edges of the letters.
After it was all dry, they mounted the board with the 1 x 8 in front of it with “L” brackets from behind. It wasn’t steady enough to stand on its own, but they planned to put it up against where their drums sit (there is a ledge) so it would stay in place. Then, they inserted large white Christmas lights (took the bulbs out first) and stapled them to the back of the board.
They used light bulbs hung from black wire and rods from the ceiling to complete the look. The total cost was around $100 because they already had the light bulbs, rods and wires.


Nice WIRED sign! Here’s a painter’s trick for fine lines for the letters: when you put the tape for the lettering, cover all edges of the tape with a very thin layer of caulking (I use my finger and have a small cup to wet it down a bit when needed). Just covering the edges, make sure the caulking SEALS them. Then, when you paint the board and over the letters (of course, you’re painting over the caulking as well), no paint seeps through underneath the tape. When you peel off the tape, you have very fine cut lines.
Thanks Ray! Great idea!