


Duncan Campbell from New Braunfels Church of Christ in New Braunfels, Texas brings us this awesome projection set.
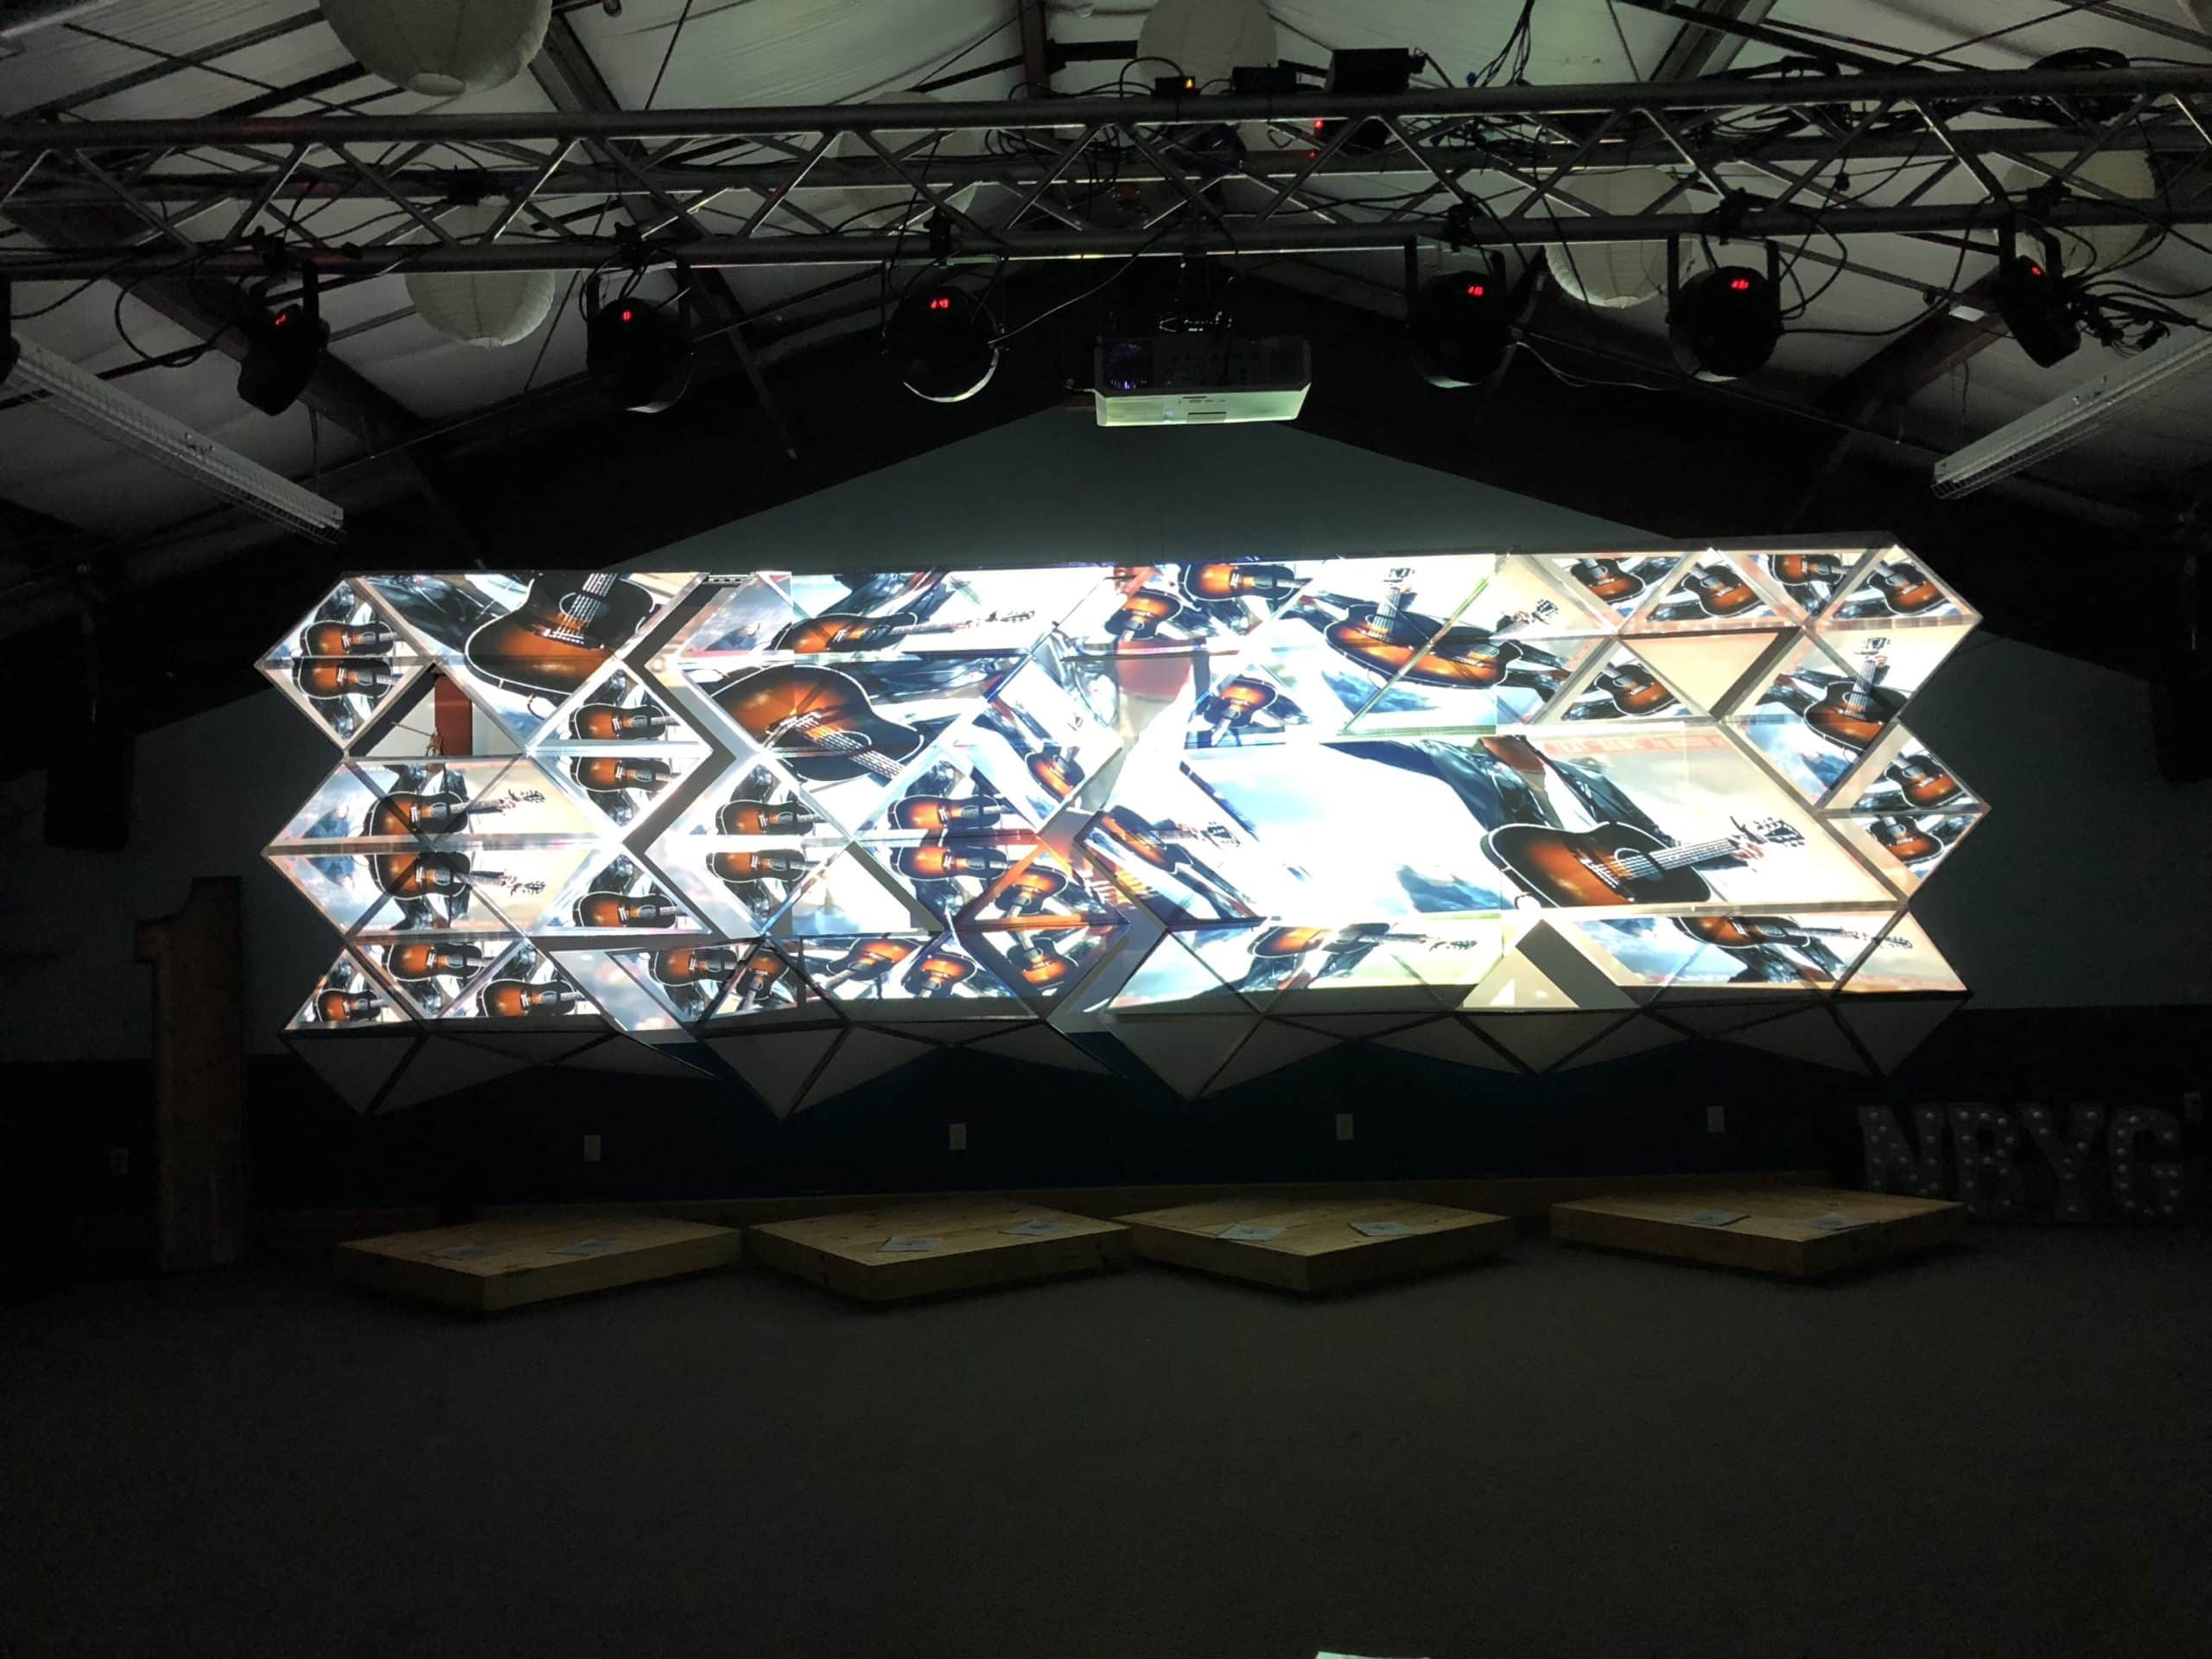
From Duncan: An array of Coroplast triangles, taped at the joints to form a low poly projection surface. The idea was to mimic a close up view of a bicycle reflector to complement our youth group’s summer theme of ‘Reflector.’ It was a fresh take on my “Polygonal” design from last year.
Materials:
6 sheets of 4×8 white coroplast, cut into right triangles
180 yards of chrome metallic duct tape (6 rolls @ 30 yds/ea.)
120 yards of regular duct tape for the reverse side
3 electrical unistruts @ 12′ each
12′ of ⅛” steel cable and turnbuckles (on hand)
2 I-beam clamps (on hand)
Nuts, bolts, washers – steel and nylon
L-brackets
12 Neodymium rare earth magnets from kjmagnetics.com (N52; holds 11 lbs/ea.) (on hand)
Dry wall screws (on hand)
X-Acto knife (on hand)
Total cost: $320
Process
1. We cut the triangles and laid them out with even space between, temporarily taping them. One entire sheet of coro was dedicated as the “lyrics area.” We sliced a triangle off one end, then attached it to the other end with white electrical tape to form a paralellogram.
2. We taped the triangles in place with the chrome duct tape, then flipped it and taped the back side with regular duct tape.
3. We cut the structure into three sections along the seams. It contributed to the overall design, but also made them easier to hang and able to be removed when/if we want to use the normal screen wall.
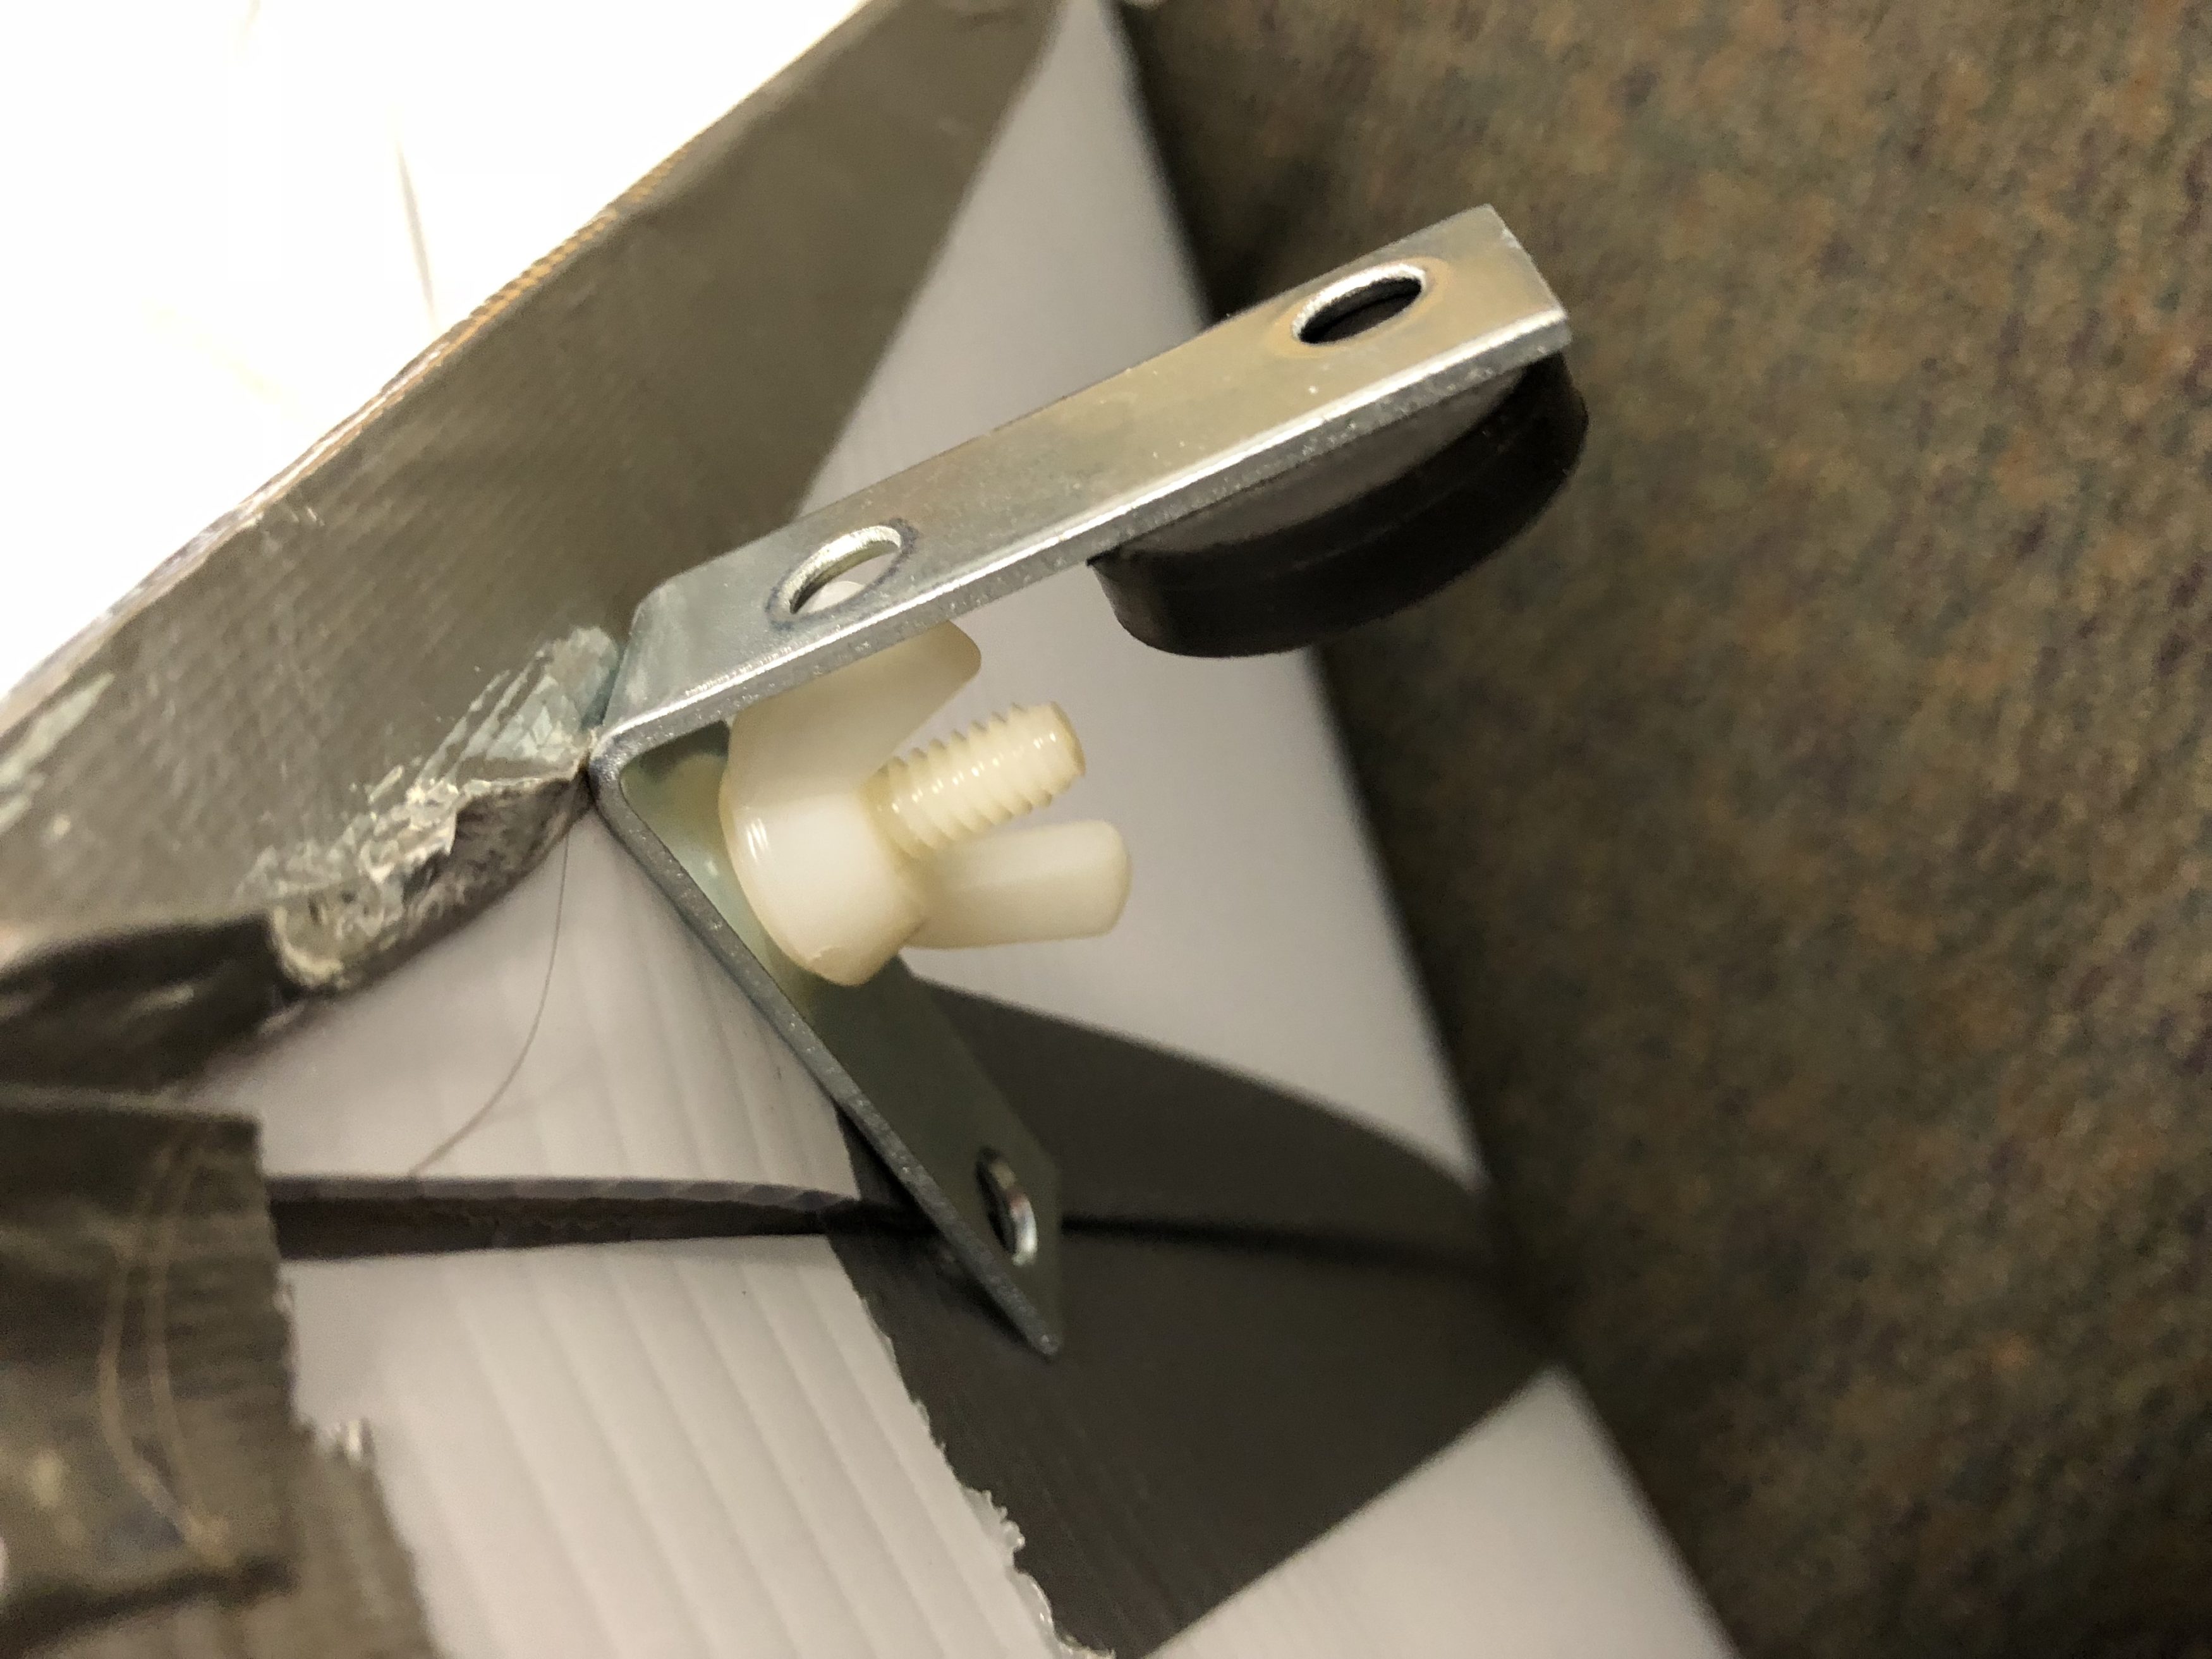
4. We drilled holes in the top of each section and attached L brackets to the back side using nylon bolts and wing nuts.
5. We grafted three sections of uni-strut together using ½” bolts and nuts. Then we secured the struts to the existing I-beams in the room using the beam clamps. We secured the middle with the steel cable and turnbuckles to shore up any sag and for added safety.
6. To hang the sections, we put the magnets on the L-brackets then clacked them into position on the strut beam. We did this for each section, arranging them for effect and visual interest.
7. Then we removed random triangles by cutting them at the seams. This was to mimic the summer graphic and the t-shirt design.
8. We lifted the bottom of the sections and secured them to the wall with drywall screws to create a 3D effect and for added stability and safety.
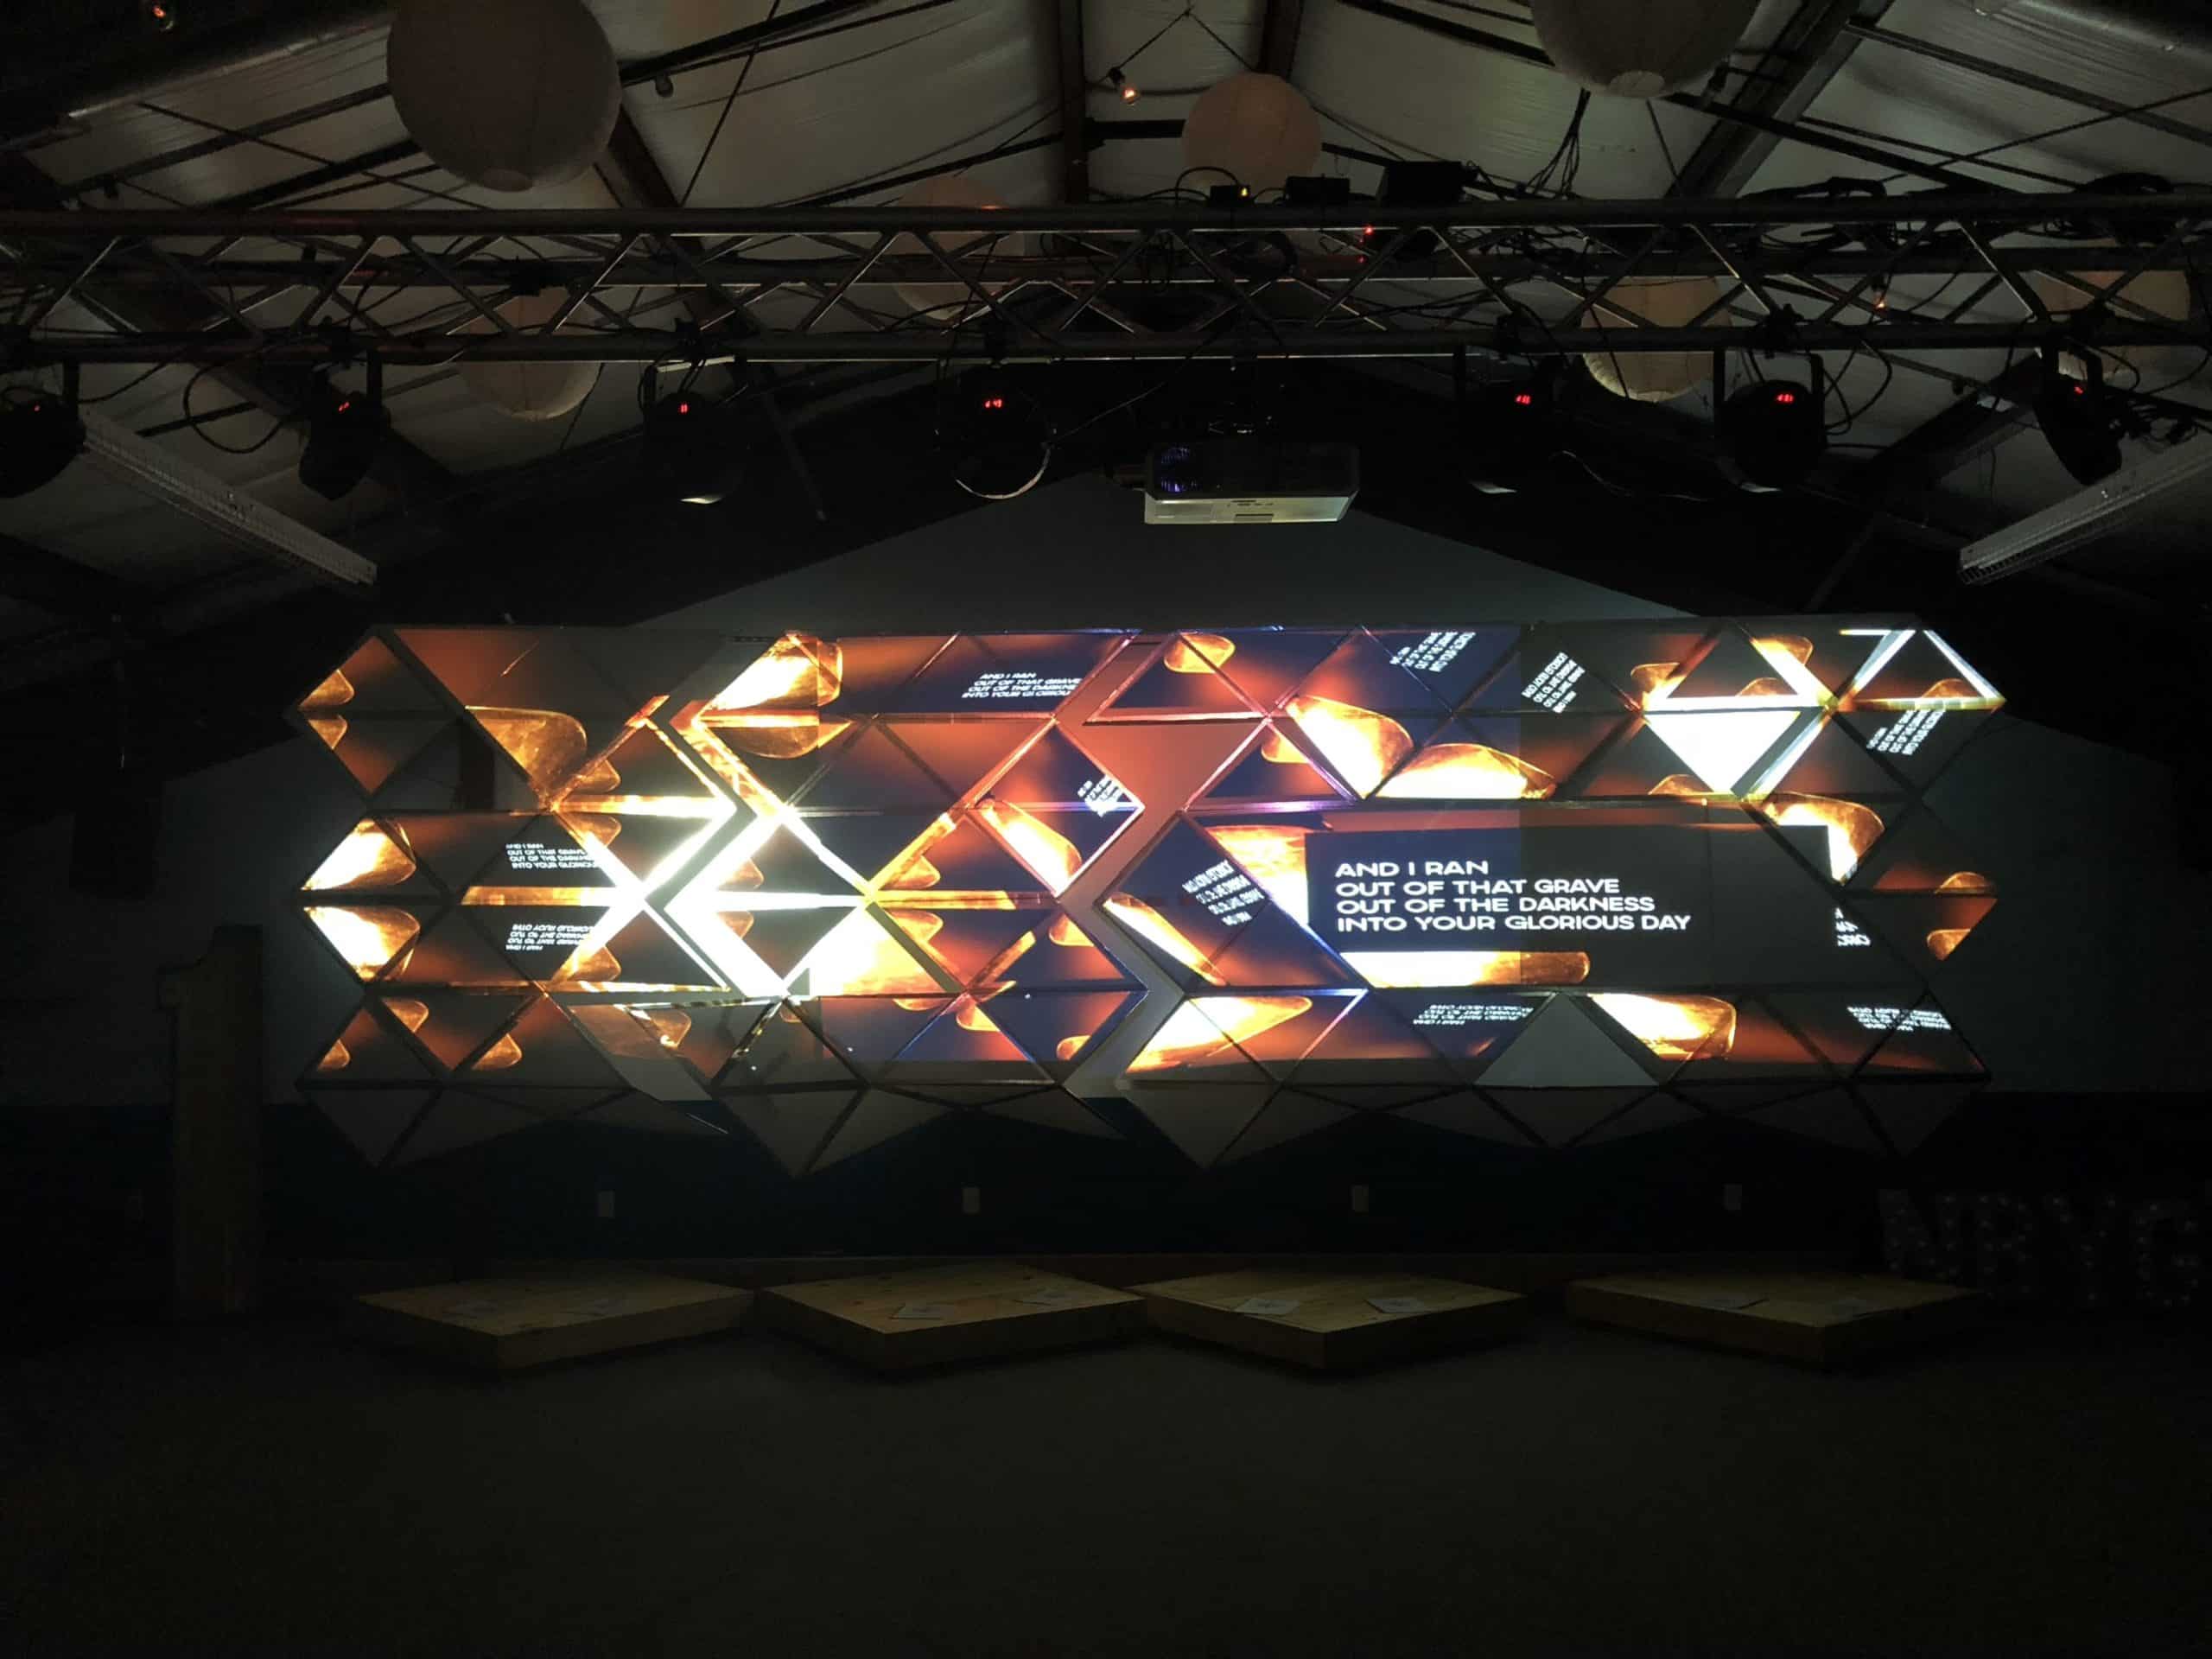
9. We used MaskeR-Ade from Crowd Control Games to create a mask for each of the individual triangles and the lyrics section. We then imported the mask into ProPresenter.
10. Then we also used MadMapper via Syphon to create various ‘reflections’ of the ProPresenter feed in the triangles.


Great design, great work team well done. Please what do you use for the image at the end? Thanks
Thanks! We used some stock images from Unsplash.com as well as some media from Visual Media Church and Church Motion Graphics.